Apr 8, 2026
Most product teams under-test their prototypes. They hold the part, eyeball the fit, say “looks good,” and move on. Then they discover problems during production, assembly, or — worst of all — after the product ships. A disciplined testing process catches those issues early, when they're cheap and easy to fix.
This checklist walks you through every test you should run on a 3D printed prototype, organized by what you're validating at each stage.
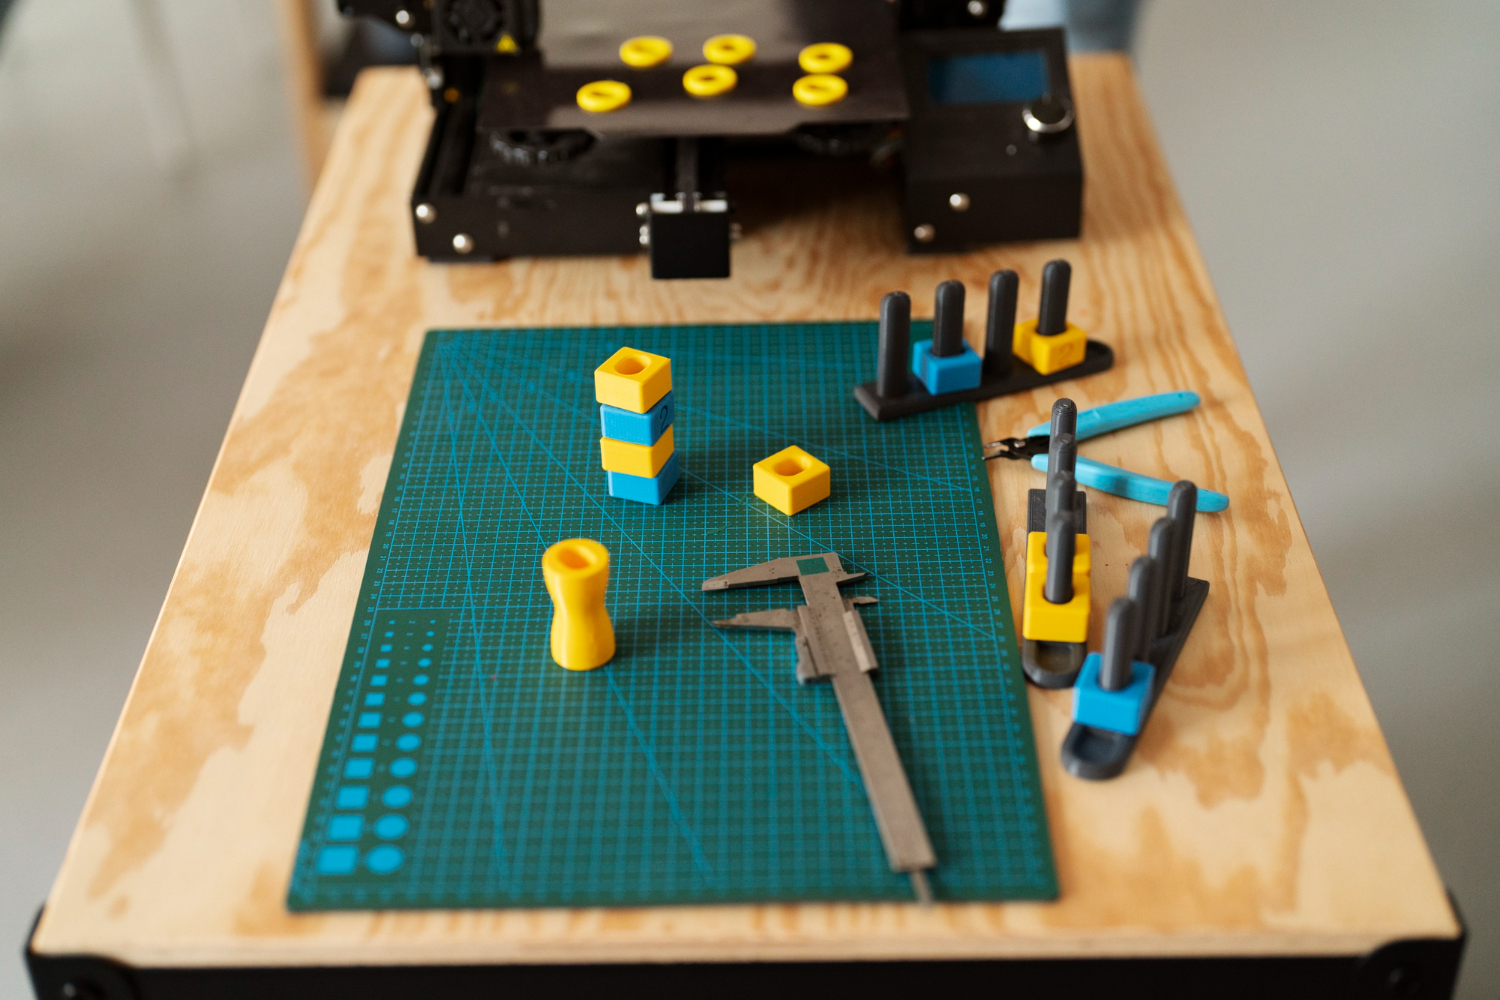
Stage 1: Visual and Dimensional Inspection
Before you test anything else, verify that the part matches your design intent. This sounds obvious, but dimensional inaccuracies from the printing process can throw off every subsequent test.
Check overall dimensions. Use digital calipers to measure length, width, and height. Compare against your CAD model. For SLA parts, expect accuracy within ±0.1–0.2mm. For SLS and MJF, ±0.3mm. For FDM, ±0.3–0.5mm. If any dimension is outside these tolerances, note it — but don't panic. Small deviations are normal and may not affect function.
Inspect critical features. Measure hole diameters, slot widths, wall thicknesses, and any features that mate with other parts. These matter more than overall dimensions because they directly affect assembly and function.
Check for warping. Place the part on a flat surface. Does it sit flat? Rock? Warping is most common in large, flat FDM parts and thin SLA parts. If you see warping, consider adjusting print orientation or adding ribs for stiffness in the next iteration.
Evaluate surface quality. Look at layer lines (FDM), surface texture (SLS/MJF), and any artifacts from support structures (SLA, FDM). These affect aesthetics and can also indicate print quality issues. Heavy layer lines or visible support marks in critical areas may require a change in print orientation.
Document everything. Photograph the part from multiple angles alongside a ruler or caliper for scale. Mark any dimensional deviations directly on the part with a marker. This documentation becomes invaluable when you're comparing iteration #3 to iteration #1 and trying to remember what changed.
Stage 2: Fit and Assembly Testing
Now that you've confirmed the part is dimensionally correct (or close enough), test how it works with other components.
Dry-fit all mating parts. If your prototype is an enclosure, insert the PCB, battery, connectors, and all internal components. Don't force anything. Parts should slide in with light pressure. If something doesn't fit, measure the gap or interference and note the exact amount.
Test snap-fits and mechanical connections. If your design includes snap-fits, clips, or press-fits, test them. Do they engage? Can you disengage them without breaking? How many cycles can they survive? For SLS nylon snap-fits, you should get 50+ cycles easily. For SLA resin, expect fewer — resin is more brittle under repeated flexing.
Check connector alignment. If your enclosure has openings for USB ports, power jacks, buttons, or displays, test alignment with the actual components installed. A misaligned USB port by 0.5mm might seem minor in CAD, but in practice it means a cable won't plug in properly. This is one of the most common issues caught during fit testing.
Test the assembly sequence. Can you actually assemble the product in a logical order? Can you reach all the fasteners? Is there enough room for your fingers or tools? Can a customer disassemble it for battery replacement or maintenance? Assembly problems are one of the hardest things to spot in CAD and one of the easiest to spot with a physical prototype.
Test with real cables and wiring. If your product has internal wiring, route actual cables through the prototype. Cables are bulkier and stiffer than CAD models suggest. Ensure there's enough room for cable bends, connectors, and strain relief.
If something doesn't fit, resist the urge to file or sand the prototype to make it work. Instead, measure the interference, update your CAD, and order a corrected print. With a 3D print on demand service, your revised part can be on your desk within 24 hours using express production. The goal is to fix the design, not the prototype.
Stage 3: Functional Testing
Functional testing validates that your product works as intended under real-world conditions. The specific tests depend on your product, but here are the most common categories.
Mechanical load testing. Apply the forces your product will experience in use. If it's a handle, pull on it. If it's a mount, load it with weight. If it's an enclosure, squeeze it. Use a kitchen scale or a simple weight-and-pulley setup to quantify the load. Note at what force the part deflects, creaks, or fails.
Keep in mind that 3D printed parts have different strength characteristics than injection-molded parts. SLS nylon is the closest to injection-molded properties. FDM parts are weakest along the layer lines (Z-axis). SLA parts are generally stiffer but more brittle. If your functional test requires properties that match the final production material, choose your printing technology accordingly.
Thermal testing. If your product generates heat or operates in temperature extremes, test it. Run your electronics inside the enclosure at full load and measure internal temperature over time. Use an infrared thermometer or thermocouple. If temperatures exceed your component ratings, you need better ventilation or thermal management — and you'll want to test revised designs quickly.
PLA softens at around 60°C, so avoid it for anything near heat sources. ABS handles up to 100°C. Nylon PA12 handles up to 110°C. PETG sits in between at around 80°C.
Water and dust resistance. If your product will be used outdoors or in wet environments, test sealing. Submerge the prototype or spray it with water while electronics are installed (use a test PCB, not your production board). Check for water ingress. If your enclosure relies on gaskets or O-ring seals, test with the actual sealing components installed.
Drop testing. Consumer electronics get dropped. Test it. Drop your prototype from 1 meter onto a hard surface — once on each face, each edge, and each corner. Inspect for cracks, broken snap-fits, dislodged components, and cosmetic damage. If it survives, great. If not, you've found a weakness to address in the next design iteration.
UV and weather exposure. If your product lives outdoors, consider a short weathering test. Leave a prototype outside for a week and inspect for color change, surface degradation, or brittleness. ASA is the most UV-resistant FDM material. SLS nylon holds up reasonably well. Standard PLA and most resins degrade quickly in sunlight.
Stage 4: User Testing
User testing is the most underrated stage of prototype validation. It reveals problems that no amount of engineering analysis will catch.
Put the prototype in someone else's hands. Watch them interact with it without coaching. Where do they hold it? Which way do they try to open it? Can they find the buttons? Do they try to force something that should slide? Their instinctive behavior tells you whether your design is intuitive.
Test ergonomics. Is the product comfortable to hold for extended periods? Are buttons easy to reach with a natural hand position? Is it too heavy? Too light? Does it feel cheap or premium? These subjective assessments are impossible to make from a screen and immediately obvious with a physical prototype.
Gather structured feedback. Ask specific questions: “On a scale of 1–5, how easy was it to insert the cable?” is more useful than “What do you think?” Document all feedback and prioritize changes based on frequency and severity.
Test with edge cases. Left-handed users. People with large or small hands. Users who aren't familiar with your product category. Someone who has never seen your product before. These edge cases reveal assumptions in your design that you didn't know you were making.
For consumer products, aim to test with 5–10 users. Research shows that 5 users will catch roughly 80% of usability issues. For each round of user testing, order fresh prototypes in the final material and finish — user perception is influenced by how the prototype looks and feels, not just how it functions.
Stage 5: Iterate and Retest
Testing without iterating is just documentation. The whole point of rapid prototyping with an on-demand 3D printing service is to find problems and fix them fast.
After each round of testing, categorize your findings. Critical issues are things that prevent the product from functioning (parts don't fit, snaps break, overheating). These block progress and must be fixed before any other testing. Major issues are things that work but poorly (tight tolerances, uncomfortable grip, confusing button layout). Fix these in the next iteration. Minor issues are cosmetic or preference-based (slightly rough surface, color doesn't feel right, minor aesthetic concerns). Batch these and address them in a later revision.
Update your CAD and order the next iteration. With 3D print on demand, the cycle time between identifying a problem and testing the fix can be as short as 24–48 hours. Use that speed aggressively. The fastest-moving product teams run through 5–8 prototype iterations in the time it takes traditional teams to do 2.
Keep a prototype log. For each iteration, record the version number, what changed from the previous version, what tests were run, what passed and what failed, and what changes are planned for the next version. This log prevents you from re-introducing fixed bugs, helps you track progress, and gives you a powerful narrative for investors or stakeholders (“we identified and resolved 23 issues across 6 prototype iterations”).
The Testing Mindset
The goal of prototype testing isn't to confirm that your design is good — it's to find everything that's wrong with it. Every issue you catch during prototyping is an issue you don't discover during production, during assembly, or through a customer complaint.
A professional 3D printing service makes this testing cycle fast and affordable. At 3D On Demand, our express production options mean you can test a new iteration every day if needed. Our engineering team can also review your design and flag potential issues before you print — catching problems even earlier in the cycle.
The best products aren't designed right the first time. They're iterated, tested, and refined until they're right. On-demand 3D printing makes that process fast enough to actually do it properly.

Apr 8, 2026
Design during the day, print overnight, test the next morning. A practical workflow for running rapid prototyping iterations at one per day.
Apr 8, 2026
The real economics of moving from 3D printed prototypes to volume production. Cost curves, crossover points, and the bridge manufacturing strategy explained.
.webp)


Copyright © 3D On Demand